Using rclone to Mount Google Drive
Brief
Rclone is a versatile, open-source tool that enables you to integrate your Google Drive with your local file system. The process, often referred to as "mounting", essentially allows your system to treat your Google Drive as if it were a local directory. This integration offers seamless navigation capabilities, such as using the cd command to enter it, or employing a local file manager, like thunar, to explore your Google Drive contents. Moreover, the process of uploading files becomes simplified, where you merely need to copy files from your local directory to the mounted Google Drive directory, just as you would within your local storage.
Installation
To install rclone, you can either visit the downloads page rclone downloads or use your package manager.
NOTE: You might need the latest version of rclone for Google Drive authentication, which may not be available in your local repositories. In my case, the Ubuntu repositories had rclone version 1.50; however, Google Drive authentication required rclone 1.60. The downloads' webpage is certain to always have the latest version.
Authentication
Before beginning the rclone configuration, we need to provide the application with the permissions to access our drive. To do this, we first need to set up our Google Account.
You only have to set this up once for each account. If you already have a "Client ID" and a "Client Secret", then proceed to the Configuration Section
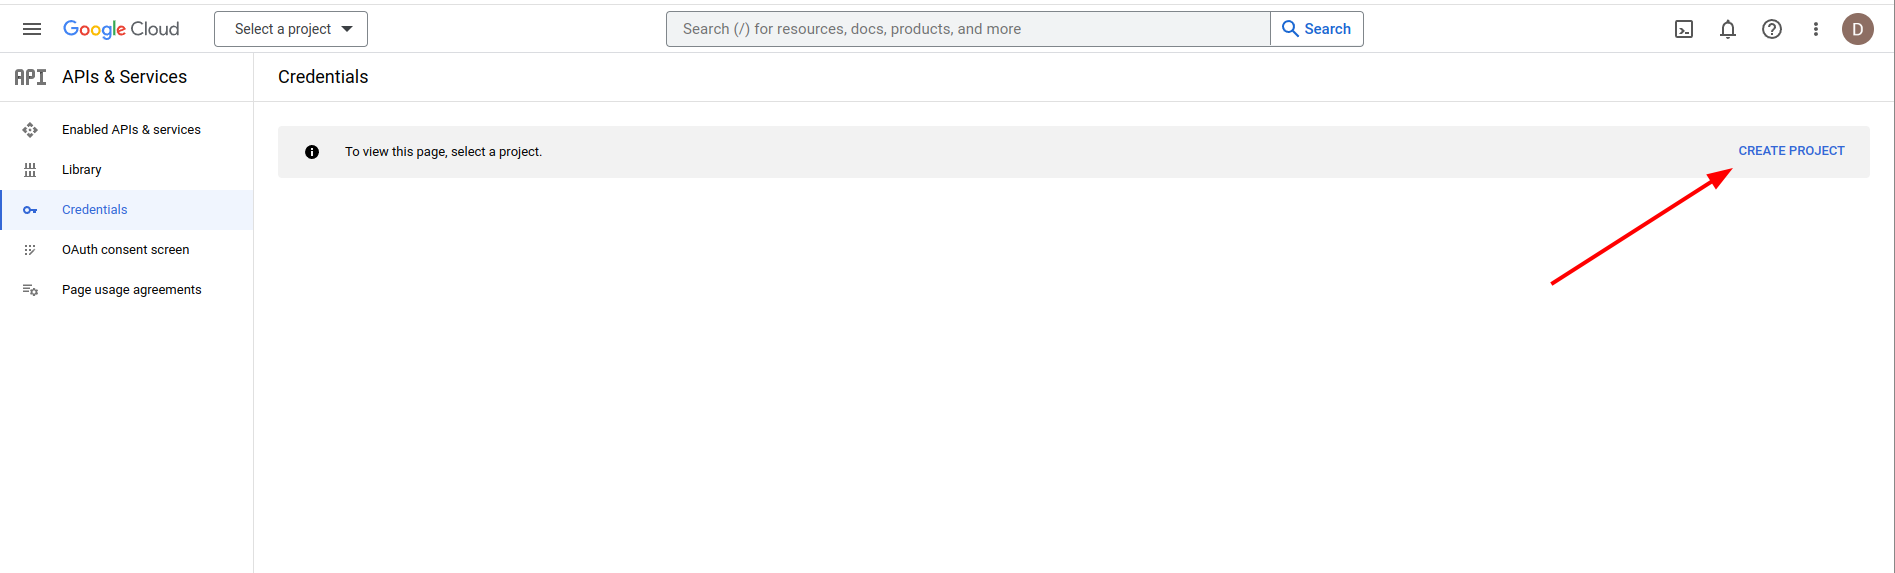
Visit this URL to access the Google Cloud Console: Google Cloud Console.
Create a Project
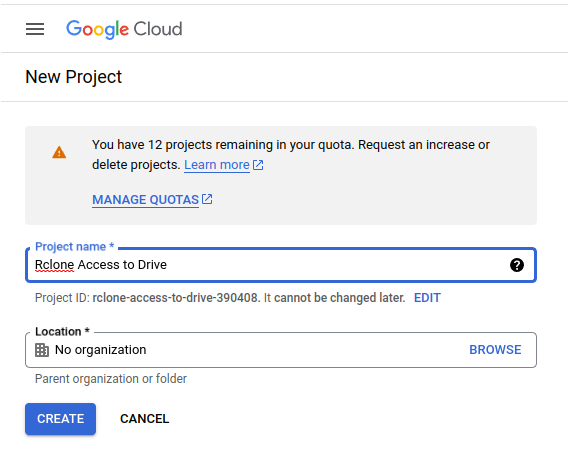
To allow rclone to access our drive, we first need to create a new project.
Give the project a suitable name and click on "Create".
Create Credentials
Now, under our new project, we want to "Create Credentials".
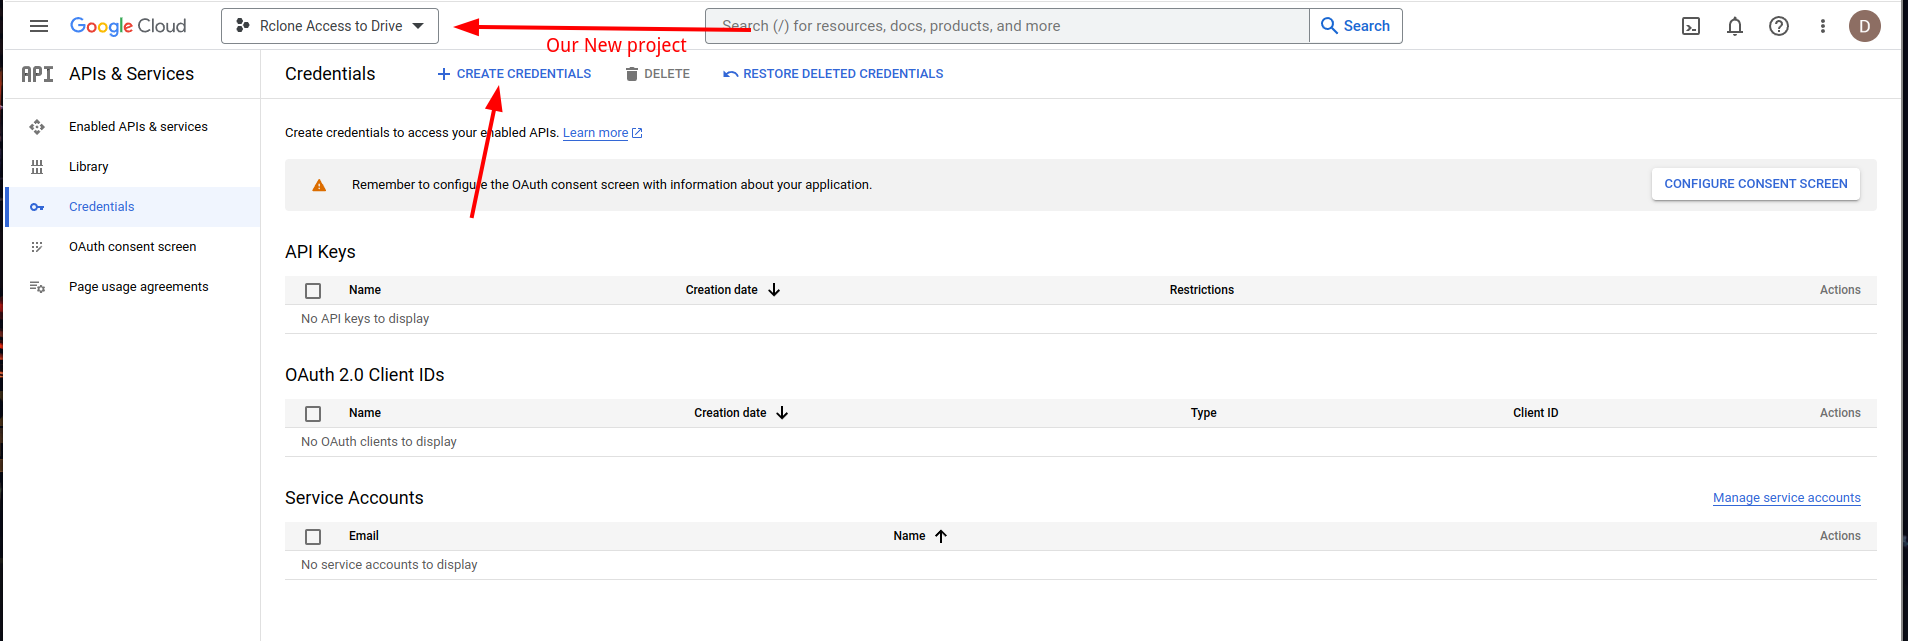
Select "OAuth Client ID" when given a choice of credentials.
This will likely display the following message: "To create an OAuth client ID, you must first configure your consent screen". Click on "Configure Consent Screen" to proceed.
OAuth Consent Screen
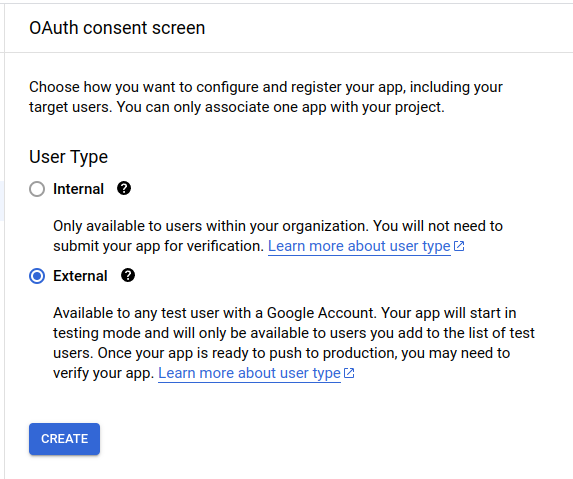
Select "External" here, as we need to provide rclone with access to our drive.
Simply follow the instructions and fill out all the required fields:
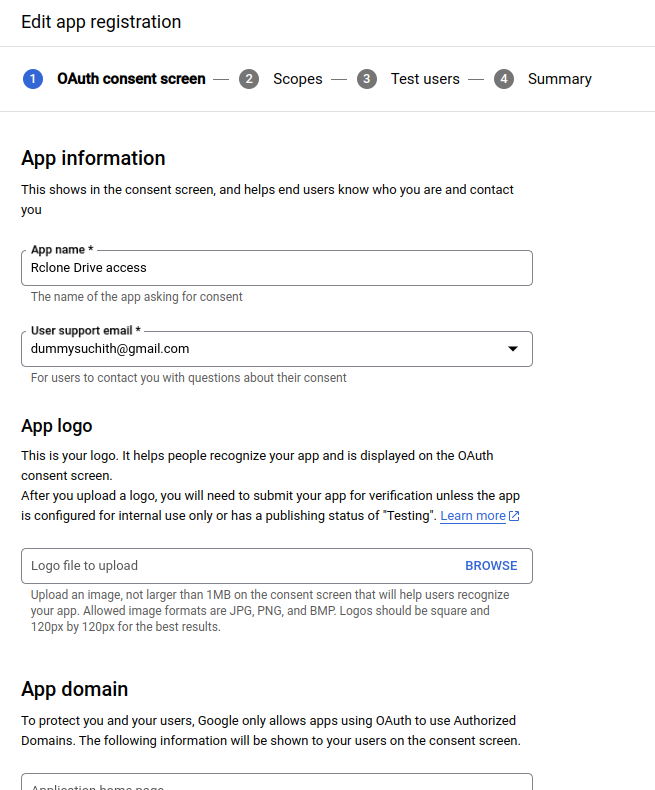
Provide your email address for all the required fields.
For the subsequent pages, just click "Save and continue". No changes are required here.
Once you click "back to dashboard" at the end, you'll see the following screen. Click on "publish app" to allow rclone to access this API.

This should be the final screen:

Create Credentials (Pt 2)
Next, return to "Credentials" on the left and click on "Create Credentials", followed by "OAuth Client ID".
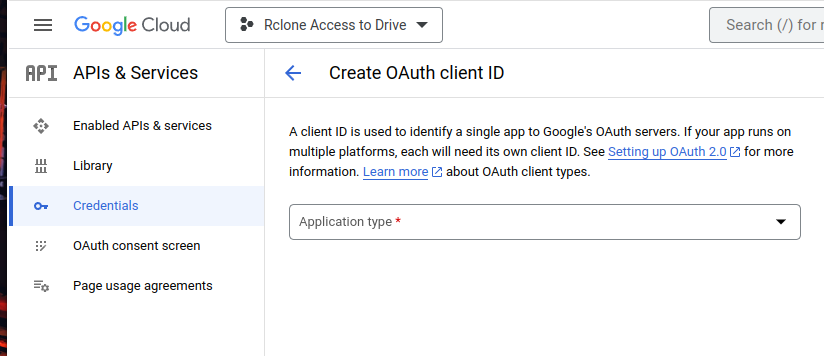

After selecting "Desktop App", provide a valid name for the application, and click "Create". You will then see this screen:
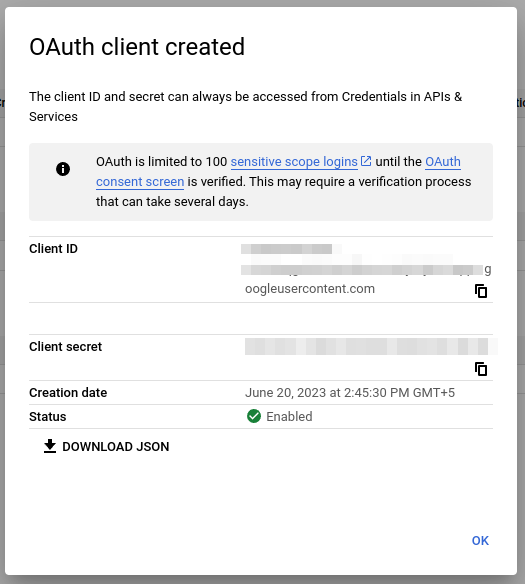
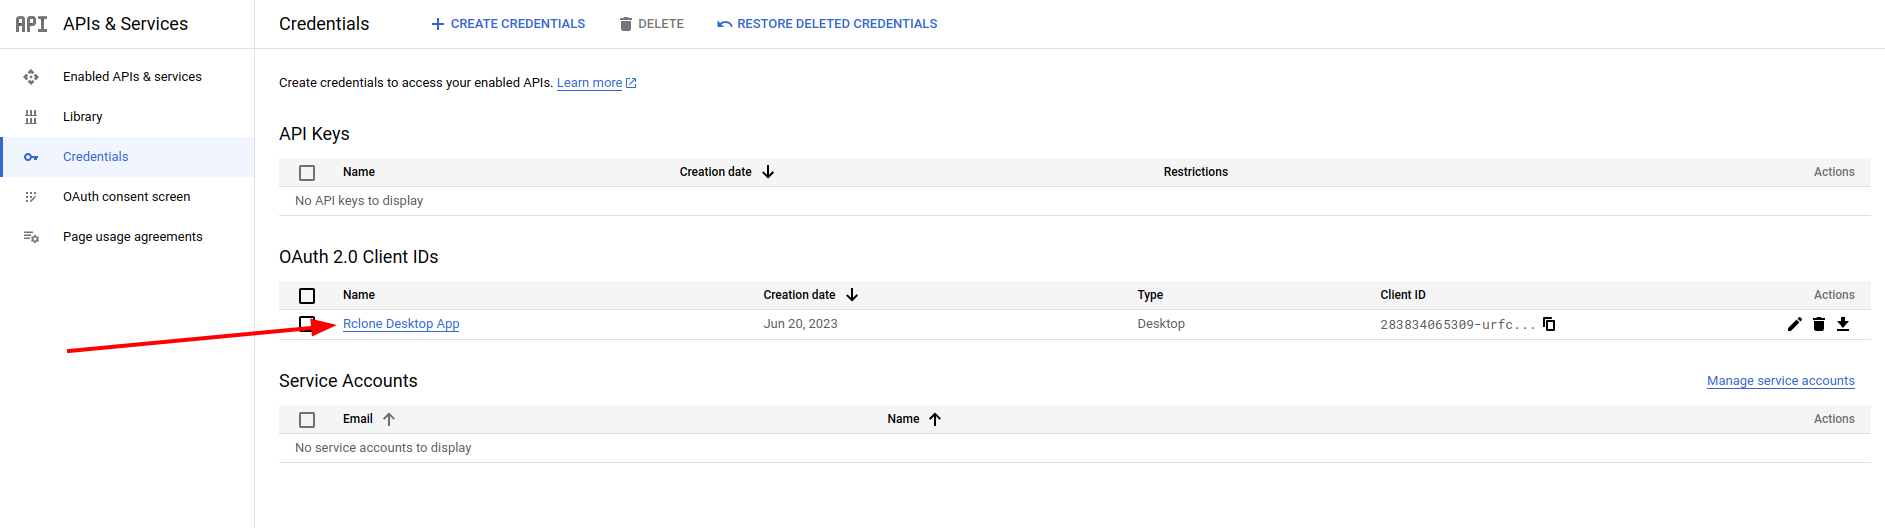
Here, the "Client ID" and the "Client Secret" are the two crucial fields for us. You can always view this information again by clicking on the following link:
Now, we can proceed to the configuration.
Configuration
Before you begin, ensure you have a "Client ID" and a "Client Secret". If not, follow the section Authentication for details on how to obtain these.
Configuring rclone with Google Drive is as simple as running the following command.
This will guide you through a CLI and ask you a few questions.
Note:
- You are attempting to create a new remote.
- Your choice of storage is "drive".
- The choice of scope depends on your situation.
- We won't use a "Service Account Credentials JSON file path".
Google Drive Authentication
Use the "Client ID" and "Client Secret" from Google Cloud Console to authenticate Rclone for Google Drive.
If you are working on a system with a web browser that can be used to authenticate rclone, respond "Y" when asked "Use web browser to automatically authenticate rclone with remote?", and follow the instructions. If not, respond with "N" and follow the steps provided.
Note: If you are working on a machine without a browser, you will need ANOTHER machine with rclone and a browser to authenticate for the browser-less machine.
Advanced config
The rest of the configuration, you can just choose the default options and you should be set. At the end of the configuration you'll see
y) Yes this is OK
e) Edit this remote
d) Delete this remote
y/e/d> y
And choosing "y" will make that create a new remote with that configuration.
Then you can choose the "q" options to quit out of rclone configuration mode.
Usage
Mounting
To mount Google Drive onto a folder on your system, use the following command:
rclone mount '<Name of remote>:' <mount point>
Here <Name of remote> the name that was provide during the configuration and can be checked using rclone listremotes. The mount point must be an empty directory where Google Drive will be mounted.
Note that this will start a process in the foreground. I usually have an alias such as this one in my .bashrc:
alias mount-google-drive="setsid -f rclone mount 'google-drive:' /home/suchi/google-drive"
Unmounting
To safely unmount Google Drive run the following command:
fusermount -u <mount point>
Where <mount point> is the location where Google Drive (using rclone) has been mounted.